
仮想エッジデバイスからAzure IoT Hubへデータを送信し、そのデータをAzure Functionsで確認するまでを試します。
- はじめに
- IoT Hubの作成
- 仮想エッジデバイス設定
- Azure IoT Hubへの接続・データ送信
- Azure FunctionsからAzure IoT Hubへの接続
- Azure FunctionsでのIoTデータの確認
- 終わりに
はじめに
IoTの初心者が、IoTデバイスからのデータの流れを理解するために検証した内容になります。
本検証は以下を参考にしております。
Linux 上に Azure IoT Edge デバイスを作成するクイック スタート | Microsoft Docs
IoT Hubの作成
Azure portalにログインしIoT HubのサービスページからIoT Hubを作成します。
接続の構成は”パブリックアクセス”、価格とスケールティアは”F1:Freeレベル”にして、他の設定はデフォルトにします。※F1が利用できない場合には別のティアを選択します
デプロイが完了したら作成したリソースに移動し、左メニューの「IoT Edge」をクリックしてIoT Edgeデバイスの追加を行います。デバイスIDは”test-device01”にします。

仮想エッジデバイス設定
物理的なIoTデバイスを用意できないので、仮想マシンをエッジデバイスとして使用します。
以下のAzure Resource Manager テンプレートのページを開きます。
GitHub - Azure/iotedge-vm-deploy at 1.2
”Deploy to Azure”をクリックして仮想マシンをデプロイします。

Device Connection Stringには追加したIoT Edgeデバイスの”プライマリ接続文字列”の値を入力します。

デプロイが完了したらVMにSSHでログインし、IoT Edgeランタイムの状態を確認します。
azureUser@test-vm-device01:~$ sudo iotedge system status
System services:
aziot-edged Running
aziot-identityd Running
aziot-keyd Running
aziot-certd Running
aziot-tpmd ReadyUse 'iotedge system logs' to check for non-fatal errors.
Use 'iotedge check' to diagnose connectivity and configuration issues.
azureUser@test-vm-device01:~$
edgeAgentの実行を確認します。
azureUser@test-vm-device01:~$ sudo iotedge list
NAME STATUS DESCRIPTION CONFIG
edgeAgent running Up an hour mcr.microsoft.com/azureiotedge-agent:1.2
azureUser@test-vm-device01:~$
Azure IoT Hubへの接続・データ送信
エッジデバイス用のモジュールを設定して、データが送信されることを確認します。

作成したエッジデバイスのページで”モジュールを設定する”をクリックします。

Marketplaceモジュールを選択します。
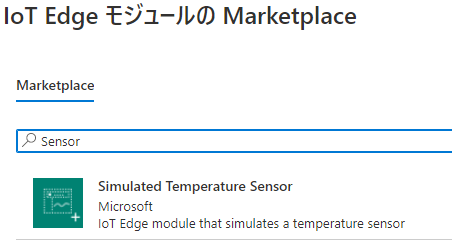
Simulated Temperature Sensorを選択します。

ランタイムの設定をクリックします。


Edgeエージェント、EdgeハブのそれぞれのイメージのURIを1.1から1.2に変更して「適用」をクリックします。

routeの行を削除して、確認と作成画面から「作成」をクリックします。
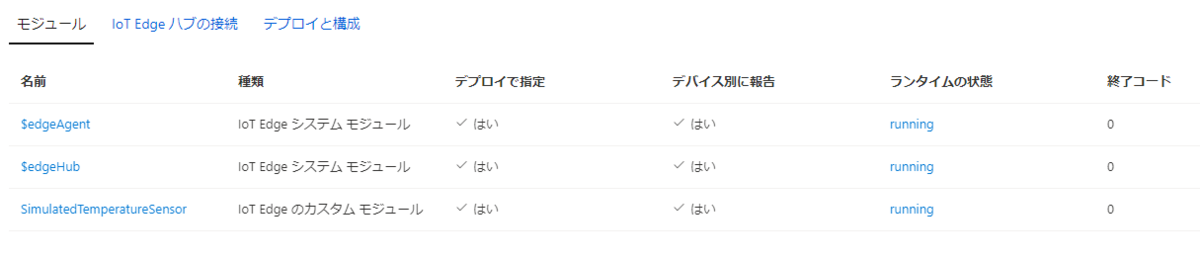
モジュールがこのように表示されることを確認します。
azureUser@test-vm-device01:~$ sudo iotedge logs SimulatedTemperatureSensor -f
[2022-04-12 13:21:33 : Starting Module
SimulatedTemperatureSensor Main() started.
Initializing simulated temperature sensor to send 500 messages, at an interval of 5 seconds.
To change this, set the environment variable MessageCount to the number of messages that should be sent (set it to -1 to send unlimited messages).
[Information]: Trying to initialize module client using transport type [Amqp_Tcp_Only].
[Information]: Successfully initialized module client of transport type [Amqp_Tcp_Only].
04/12/2022 13:21:49> Sending message: 1, Body: [{"machine":{"temperature":21.42021305517769,"pressure":1.0478723733746735},"ambient":{"temperature":21.021244535465375,"humidity":26},"timeCreated":"2022-04-12T13:21:49.5922717Z"}]
04/12/2022 13:21:54> Sending message: 2, Body: [{"machine":{"temperature":22.111287637665534,"pressure":1.1266023891011367},"ambient":{"temperature":20.984481364248545,"humidity":24},"timeCreated":"2022-04-12T13:21:54.7463353Z"}]
センサーモジュールの送信データを確認します。
Azure Cloud Shellで以下のコマンドを実行して受信データを確認します。
az iot hub monitor-events -n <IoT Hub 名>

Azure FunctionsからAzure IoT Hubへの接続
Azure Functionsを作成し、Azure IoT Hubへ接続、データの確認をします。
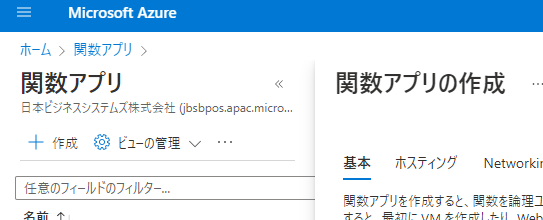
関数アプリを作成します。
ランタイムスタックはNode.js、地域はIoT Hubを作成したリージョンにします。
オペレーティングシステムはWindowsを選択します。
関数を作成します。
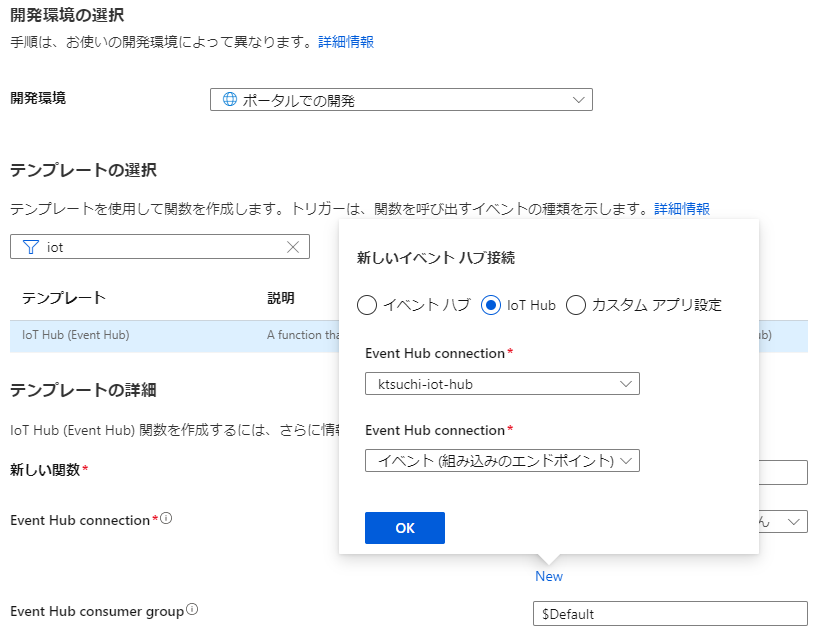
「IoT Hub(Event Hub)」テンプレートを選択し、
”新しいイベントハブ接続”を”IoT Hub”にすることで作成したIoT Hubを選択できます。
Azure FunctionsでのIoTデータの確認
module.exports = function (context, IoTHubMessages) {context.log(`${IoTHubMessages}`);});
作成した関数アプリに上記コード記述して、実行します。
接続されました。2022-04-25T01:12:58.790 [Information] Executing 'Functions.IoTHub_EventHub1' (Reason='This function was programmatically called via the host APIs.', Id=1febaa8d-2768-4631-9cb3-754f44ba9b65)2022-04-25T01:12:58.794 [Information] JavaScript eventhub trigger function called for message array: {"machine": {"temperature": 101.4368975675603,"pressure": 10.163697191241045},"ambient": {"temperature": 20.901987055969418,"humidity": 26},"timeCreated": "2022-04-20T12:33:23.4779547Z"}2022-04-25T01:12:58.794 [Information] Processed message1: {"machine": {"temperature": 101.4368975675603,"pressure": 10.163697191241045},"ambient": {"temperature": 20.901987055969418,"humidity": 26},"timeCreated": "2022-04-20T12:33:23.4779547Z"}2022-04-25T01:12:58.795 [Information] undefined2022-04-25T01:12:58.796 [Information] Executed 'Functions.IoTHub_EventHub1' (Succeeded, Id=1febaa8d-2768-4631-9cb3-754f44ba9b65, Duration=5ms)
ログにIoT Hubで受け取ったデータが出力されます。
値を取り出すときはJSONをパースしましょう。
JSON.parse(message)
終わりに
関数アプリでのデータの出力がうまくいかず非常に悩みました。
Azure Cloud Shellの実行結果から関数アプリに問題がありそうだったので、再作成することでデータの出力がうまくいきました。
どうやら関数アプリからIoT Hub への接続設定がおかしかったようです。
データの受け取りさえできれば、あとはBlobストレージやSQL Databaseへ格納することでいろいろなことに応用できそうです。

土山 和也(日本ビジネスシステムズ株式会社)
ユーザーサポート、開発、運用、構築業務を経験し、現在はアーキテクトとして提案・プロジェクト支援に従事。専門はデータベースでDBA歴十数年。Azure/AWSを担当。
担当記事一覧