【Microsoft×生成AI連載】寺澤です。今回はMicrosoft Copilot Studioで作成したCopilotのチャット画面の見た目を変更してみました。
CopilotはMicrosoft Teams、Microsoft Power Apps、Webアプリケーションで展開が可能なので、その3つで試してみます。
これまでの連載
これまでの連載記事一覧はこちらの記事にまとめておりますので、過去の連載を確認されたい方はこちらの記事をご参照ください。
前提
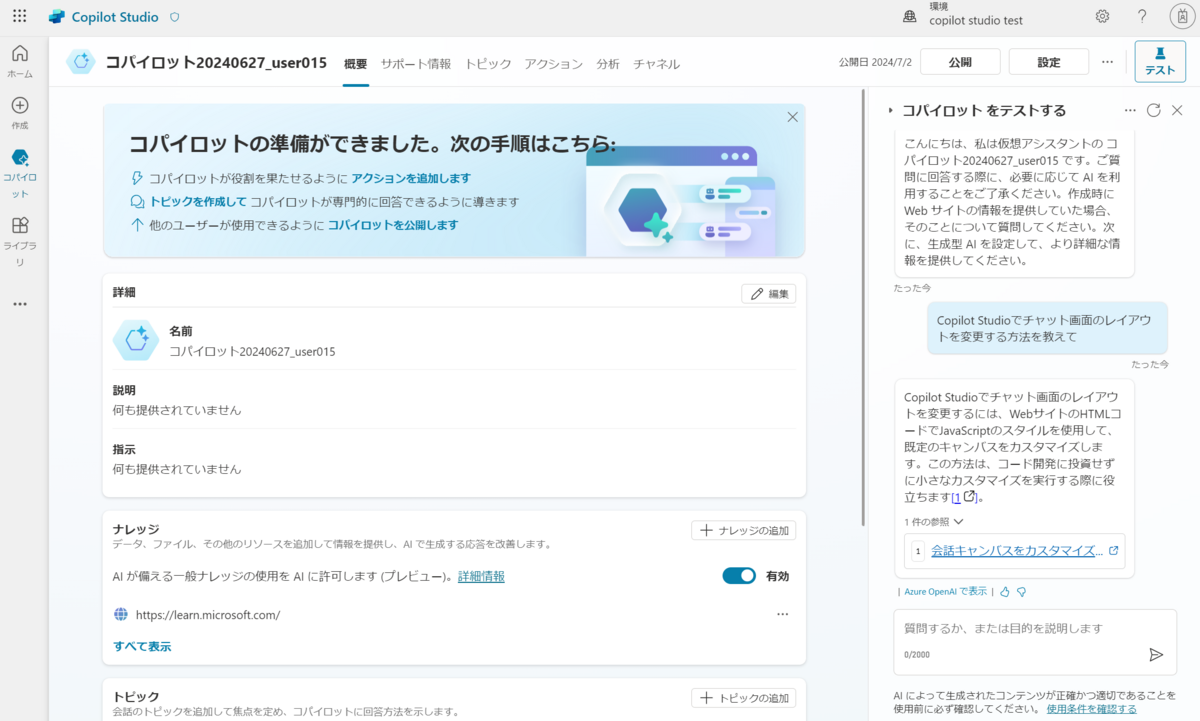
今回、Copilotは作成されていることを前提とします。下記はMicrosoft Copilot Studio上で動作テストした画面です。
Microsoft Power Apps
Copilotコンポーネント
デザイン
Microsoft Power Appsのキャンバスアプリ上でのチャット画面自体は、大きさ以外ほとんどデザインを変更できませんでした。
キャンバスアプリのコンポーネントでは基本的にプロパティを変更してデザインを変更するのですが、あまり変更できるプロパティは用意されていませんでした。
ただ、キャンバスアプリ自体(キャンバスの背景色等)は様々なデザインの変更が可能なので、それらを組み合わせるとデザインをよくできるかもしれません。
※今回はCopilotコンポーネントのみのプロパティの変更について記載しています。
変更前後の比較は下記のとおりです。
変更前:

変更後:

実装方法
Microsoft Power AppsでCopilotを使用する場合の手順を記載します。
PowerPlatform管理センターの[環境]>[対象の環境]>[設定]の製品の[機能]を選択します。*1

[機能]の[キャンバス エディターで Copilot 回答コンポーネントを挿入することが可能になるため、事前定義されたデータ クエリに対し、AI を活用した回答を受信できます。]をオンにします。

Microsoft Power Appsのキャンバスアプリの[挿入]タブで"Copilot"と検索します。

「一覧項目が見つかりませんでした」となる場合は[設定]を開きます。

[更新]でCopilotを検索し、一度[Copilot コンポーネント]をオフにして、再度オンにします。※すでにオンになっている場合も一度オフにする必要がありました。

[挿入]で"Copilot"を検索し、Copilotを選択します。


新しいCopilotを作成して設定する場合、[Copilot]コンポーネントの[プロパティ]の[Power Virtual Agentで編集する]で[編集]を押します。

[Copilot Studioで編集する]を選択すると、新しいCopilotを作成します。

既存のCopilotを追加する場合、[Copilot]コンポーネントの[BotSchemaName]で対象のCopilotのスキーマ名を入力します。

Copilotのスキーマ名は、Microsoft Copilot Studioの[コパイロット]>[コパイロットの詳細]の詳細タブからコピーできます。

Copilotとチャットするにはデータソースに何かを選択しないとチャットができないため、サンプルのテーブルを一度設定するか、「ClearCollect(sampleTable,{})」で空のテーブルを作成し、sampleTableを設定します。
ItemsにCustomGallerySampleを入力します。(テーブルを作成している場合は、sampleTableと入力します)

問題なくチャットができれば完了です。

参照:キャンバス アプリ ユーザーに Copilot コントロールを追加する - Power Apps | Microsoft Learn
チャットボットコンポーネント
チャットボットコンポーネントもCopilotコンポーネントと同様、Microsoft Power Appsのキャンバスアプリ上でのチャット画面となるため、あまりデザインを変更できませんでした。
変更前後の比較は下記のとおりです。
変更前:

変更後:

実装方法
Microsoft Power AppsでCopilotを使用する場合の手順を記載します。
キャンバスアプリの[挿入]で"チャットボット"と検索します。

「一覧項目が見つかりませんでした」となる場合は[設定]を開きます。
[更新]の[廃止済み]から[チャットボット コンポーネント]をオンにします。

[挿入]で"チャットボット"を検索し、チャットボットを選択します。

追加したチャットボットで、対象のコパイロットを選択します。

追加し、問題なくチャットができれば完了です。
Microsoft Teams
Teams上ではアイコンの変更が可能でした。アイコンの変更はMicrosoft Copilot Studioから変更可能です。
デザイン
変更前後の比較は下記のとおりです。
変更前:


変更後:
Copilotのチャット画面です。チャット画面のアイコンを変更しました。

下記はCopilotにカーソルを合わせた際に表示される説明画面です。説明画面のアイコンを変更しました。説明画面のアイコンはチャット画面のアイコンとは別でセットが可能です。

変更方法
アイコンの変更方法は下記のとおりです。
[コパイロット]で変更対象を選択し、[設定]を押します。

表示された画面で[コパイロットの詳細]の[アイコン変更]を押します。

変更したい画像を選択し、保存を押すと完了です。
※Teams上で変更されるまで時間がかかる場合があります。

Copilotにカーソルを合わせた際の説明画面で表示されるアイコンの変更方法は下記です。
[コパイロット]で変更対象を選択し、[チャネル]の[Microsoft Teams]を押します。

下記の画面が表示された場合は[有効にする]を選択します。

[詳細の編集]を押します。

[色の変更]で背景色、[アイコンの変更]でアイコンを変更可能です。変更後保存を押すと完了です。
※Teams上で変更されるまで時間がかかる場合があります。

Webアプリケーション
Webアプリケーションでのデザインは、用意されているプロパティの値で変更ができました。
デザイン
変更前後の比較は下記のとおりです。
変更前:

変更後:

実装方法
実行できるWebアプリケーションはすでに作成済みである前提で記載します。CopilotはHTML形式で埋め込むことができます。
下記の<COPILOT TOKEN ENDPOINT>にCopilotのトークンエンドポイントに置き換えます。
コード:
<!doctype html>
 <html lang="en">
   <head>
     <title>Contoso Sample Web Chat</title>
     <!--
       This styling is for the Web Chat demonstration purposes.
       It is recommended that style is moved to a separate file for organization in larger projects.

       Please visit https://github.com/microsoft/BotFramework-WebChat for details about Web Chat.
     -->
     <style>
       html,
       body {
         height: 100%;
       }

       body {
         margin: 0;
       }

       h1 {
         color: whitesmoke;
         font-family: Segoe UI;
         font-size: 16px;
         line-height: 20px;
         margin: 0;
         padding: 0 20px;
       }

       #banner {
         align-items: center;
         background-color: black;
         display: flex;
         height: 50px;
       }

       #webchat {
         height: calc(100% - 50px);
         overflow: hidden;
         position: fixed;
         top: 50px;
         width: 100%;
       }
     </style>
   </head>
   <body>
     <div>
       <div id="banner">
         <h1>Contoso copilot name</h1>
       </div>
       <div id="webchat" role="main"></div>
     </div>

     <!--
       In this sample, the latest version of Web Chat is being used.
       In production environment, the version number should be pinned and version bump should be done frequently.

       Please visit https://github.com/microsoft/BotFramework-WebChat/tree/main/CHANGELOG.md for changelog.
     -->
     <script crossorigin="anonymous" src="https://cdn.botframework.com/botframework-webchat/latest/webchat.js"></script>

     <script>
       (async function () {
         // Specifies style options to customize the Web Chat canvas.
         // Please visit https://microsoft.github.io/BotFramework-WebChat for customization samples.
         const styleOptions = {
           // Hide upload button.
           hideUploadButton: true
         };

         // Specifies the token endpoint URL.
         // To get this value, visit Copilot Studio > Settings > Channels > Mobile app page.
         const tokenEndpointURL = new URL('<COPILOT TOKEN ENDPOINT>');

         // Specifies the language the copilot and Web Chat should display in:
         // - (Recommended) To match the page language, set it to document.documentElement.lang
         // - To use current user language, set it to navigator.language with a fallback language
         // - To use another language, set it to supported Unicode locale

         // Setting page language is highly recommended.
         // When page language is set, browsers will use native font for the respective language.

         const locale = document.documentElement.lang || 'en'; // Uses language specified in <html> element and fallback to English (United States).
         // const locale = navigator.language || 'ja-JP'; // Uses user preferred language and fallback to Japanese.
         // const locale = 'zh-HAnt'; // Always use Chinese (Traditional).

         const apiVersion = tokenEndpointURL.searchParams.get('api-version');

         const [directLineURL, token] = await Promise.all([
           fetch(new URL(`/powervirtualagents/regionalchannelsettings?api-version=${apiVersion}`, tokenEndpointURL))
             .then(response => {
               if (!response.ok) {
                 throw new Error('Failed to retrieve regional channel settings.');
               }

               return response.json();
             })
             .then(({ channelUrlsById: { directline } }) => directline),
           fetch(tokenEndpointURL)
             .then(response => {
               if (!response.ok) {
                 throw new Error('Failed to retrieve Direct Line token.');
               }

               return response.json();
             })
             .then(({ token }) => token)
         ]);

         // The "token" variable is the credentials for accessing the current conversation.
         // To maintain conversation across page navigation, save and reuse the token.

         // The token could have access to sensitive information about the user.
         // It must be treated like user password.

         const directLine = WebChat.createDirectLine({ domain: new URL('v3/directline', directLineURL), token });

         // Sends "startConversation" event when the connection is established.

         const subscription = directLine.connectionStatus$.subscribe({
           next(value) {
             if (value === 2) {
               directLine
                 .postActivity({
                   localTimezone: Intl.DateTimeFormat().resolvedOptions().timeZone,
                   locale,
                   name: 'startConversation',
                   type: 'event'
                 })
                 .subscribe();

               // Only send the event once, unsubscribe after the event is sent.
               subscription.unsubscribe();
             }
           }
         });

         WebChat.renderWebChat({ directLine, locale, styleOptions }, document.getElementById('webchat'));
       })();
     </script>
   </body>
 </html>
トークンエンドポイントはMicrosoft Copilot Studioの[コパイロット]の[チャネル]タブの[モバイルアプリ]を選択します。

[トークン エンドポイント]をコピーします。

変更後のコード:
<!doctype html>
<html lang="en">

<head>
    <title>Contoso Sample Web Chat</title>
    <!--
      This styling is for the Web Chat demonstration purposes.
      It is recommended that style is moved to a separate file for organization in larger projects.

      Please visit https://github.com/microsoft/BotFramework-WebChat for details about Web Chat.
    -->
    <style>
        html,
        body {
            height: 100%;
        }

        body {
            margin: 0;

        }

        h1 {
            color: whitesmoke;
            font-family: Segoe UI;
            font-size: 16px;
            line-height: 20px;
            margin: 0;
            padding: 0 20px;
        }

        #banner {
            align-items: center;
            background-color: black;
            display: flex;
            height: 50px;
        }

        #webchat {
            height: calc(100% - 50px);
            overflow: hidden;
            position: fixed;
            top: 50px;
            width: 100%;
        }

        .webchat--css-dtjuj-1vap6r.webchat__stacked-layout {
            margin-left: 100px;
        }
/* カスタムCSS */
.webchat__bubble--bot {
    display: flex;
    justify-content: flex-end;
    align-items: center;
}

    .webchat__bubble--bot .webchat__avatar {
        order: 2; /* アイコンを右側に配置 */
        margin-left: 10px; /* アイコンとテキストの間に余白を追加 */
    }

    .webchat__bubble--bot .webchat__bubble__content {
        order: 1; /* テキストを左側に配置 */
    }
    </style>
</head>
<body>
    <div>
        <div id="banner">
            <h1>Contoso copilot name</h1>
        </div>
        <div id="webchat" role="main"></div>
    </div>

    <!--
      In this sample, the latest version of Web Chat is being used.
      In production environment, the version number should be pinned and version bump should be done frequently.

      Please visit https://github.com/microsoft/BotFramework-WebChat/tree/main/CHANGELOG.md for changelog.
    -->
    <script crossorigin="anonymous" src="https://cdn.botframework.com/botframework-webchat/latest/webchat.js"></script>


    <script>
        (async function () {
            // Specifies style options to customize the Web Chat canvas.
            // Please visit https://microsoft.github.io/BotFramework-WebChat for customization samples.
            const styleOptions = {
                // Hide upload button.
                hideUploadButton: true,
                backgroundColor: 'lightblue', // チャット画面の背景色を灰色に設定

                //下記でボットの画像とユーザーの画像を変更
                accent: '#00809d',
                botAvatarBackgroundColor: '#FFFFFF',
                botAvatarImage: 'https://learn.microsoft.com/azure/bot-service/v4sdk/media/logo_bot.svg',
                botAvatarInitials: 'BT',
                userAvatarImage: 'https://avatars.githubusercontent.com/u/661465',
                userAvatarBackgroundColor: 'blue',
                userAvatarInitials: 'BT'
            };


            // Specifies the token endpoint URL.
            // To get this value, visit Copilot Studio > Settings > Channels > Mobile app page.
            const tokenEndpointURL = new URL('');

            // Specifies the language the copilot and Web Chat should display in:
            // - (Recommended) To match the page language, set it to document.documentElement.lang
            // - To use current user language, set it to navigator.language with a fallback language
            // - To use another language, set it to supported Unicode locale

            // Setting page language is highly recommended.
            // When page language is set, browsers will use native font for the respective language.

            const locale = document.documentElement.lang || 'en'; // Uses language specified in <html> element and fallback to English (United States).
            // const locale = navigator.language || 'ja-JP'; // Uses user preferred language and fallback to Japanese.
            // const locale = 'zh-HAnt'; // Always use Chinese (Traditional).

            const apiVersion = tokenEndpointURL.searchParams.get('api-version');

            const [directLineURL, token] = await Promise.all([
                fetch(new URL(`/powervirtualagents/regionalchannelsettings?api-version=${apiVersion}`, tokenEndpointURL))
                    .then(response => {
                        if (!response.ok) {
                            throw new Error('Failed to retrieve regional channel settings.');
                        }

                        return response.json();
                    })
                    .then(({ channelUrlsById: { directline } }) => directline),
                fetch(tokenEndpointURL)
                    .then(response => {
                        if (!response.ok) {
                            throw new Error('Failed to retrieve Direct Line token.');
                        }

                        return response.json();
                    })
                    .then(({ token }) => token)
            ]);

            // The "token" variable is the credentials for accessing the current conversation.
            // To maintain conversation across page navigation, save and reuse the token.

            // The token could have access to sensitive information about the user.
            // It must be treated like user password.

            const directLine = WebChat.createDirectLine({ domain: new URL('v3/directline', directLineURL), token });

            // Sends "startConversation" event when the connection is established.

            const subscription = directLine.connectionStatus$.subscribe({
                next(value) {
                    if (value === 2) {
                        directLine
                            .postActivity({
                                localTimezone: Intl.DateTimeFormat().resolvedOptions().timeZone,
                                locale,
                                name: 'startConversation',
                                type: 'event'
                            })
                            .subscribe();

                        // Only send the event once, unsubscribe after the event is sent.
                        subscription.unsubscribe();
                    }
                }
            });

            WebChat.renderWebChat({ directLine, locale, styleOptions }, document.getElementById('webchat'));
        })();

    </script>
</body>
</html>
参照:
実装方法は下記を参照しました。
変更可能なプロパティ一覧は下記です。
おわりに
今回は、Microsoft Teams、Microsoft Power Apps、WebアプリケーションでCopilotを展開し、チャット画面のデザインを変更してみました。
デザインの自由度はWebアプリケーションが最も高く、展開の容易さはMicrosoft Teams、Microsoft Power Apps、Webアプリケーションの順に優れていると感じました。
これらの結果を踏まえ、用途に合わせて使っていこうと思います。
*1:私の環境ではPowerPlatform管理センターの設定はデフォルトでオンになっていたため、変更する必要はありませんでした。