はじめに
前回の記事ではHoloLens 2でWEBアプリとビデオ通話をしてみました。
今回はHoloLens 2からTeamsのビデオ会議に参加してみたいと思います。
全体の構成は以下の通りです。

環境
Unity 2020.3.11f1
MRTK 2.7.2
azure.communication.calling.1.0.0-beta.29
手順
以下の記事の「ライブラリ導入」までは同じ手順です。
blog.jbs.co.jp
スクリプトは以下のようにします。
using System.Collections.Generic;
using UnityEngine;
using System.Threading.Tasks;
using System;

#if WINDOWS_UWP
using Azure.Communication;
using Azure.WinRT.Communication;
using Azure.Communication.Calling;
#endif

public class CommunicationServices : MonoBehaviour
{
    string tokenCredential = "[ここにAzure Communication ServicesのTokenを挿入]";
    string teamsMeetingUrl = "[ここに参加したいTeamsミーティングURLを挿入]";

#if WINDOWS_UWP
    CallAgent callAgent;
    Call call;
    DeviceManager deviceManager;
    LocalVideoStream[] localVideoStream;
#endif

#if WINDOWS_UWP
    private async Task InitCallAgentAndDeviceManager(string token)
    {
        CallClient callClient = new CallClient();
        deviceManager = await callClient.GetDeviceManager();

        CommunicationTokenCredential token_credential = new CommunicationTokenCredential(token);

        CallAgentOptions callAgentOptions = new CallAgentOptions()
        {
            DisplayName = "Test User"
        };
        callAgent = await callClient.CreateCallAgent(token_credential, callAgentOptions);
     }
#endif

    //Teamsミーティングに参加
    public async void JoinButton_Click()
    {
#if WINDOWS_UWP

        if (deviceManager.Cameras.Count > 0)
        {
            VideoDeviceInfo videoDeviceInfo = deviceManager.Cameras[0];
            localVideoStream = new LocalVideoStream[1];
            localVideoStream[0] = new LocalVideoStream(videoDeviceInfo);
        }

        JoinCallOptions joinCallOptions = new JoinCallOptions();
        joinCallOptions.VideoOptions = new VideoOptions(localVideoStream);
        TeamsMeetingLinkLocator teamsMeetingLinkLocator = new TeamsMeetingLinkLocator(teamsMeetingUrl);
        call = await callAgent.JoinAsync(teamsMeetingLinkLocator, joinCallOptions);
#endif
    }

    //Teamsミーティングから退出
    public async void LeaveButton_Click()
    {
#if WINDOWS_UWP
        await call.HangUpAsync(new HangUpOptions());
#endif
    }


    async void Start()
    {
#if WINDOWS_UWP
        await InitCallAgentAndDeviceManager(tokenCredential);
#endif
    }
}
次にUnityエディタでUIを作ります。
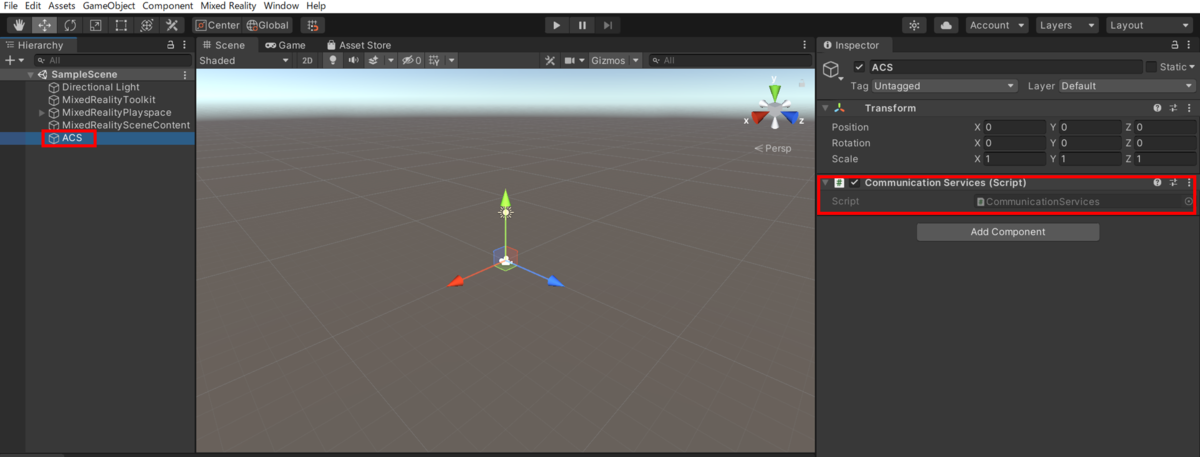
まず空のオブジェクトを作成してスクリプトを追加します。

次に以下のようにボタン(PressableButtonHoloLens2)を2つ設置します。ここではボタンの名前は「JoinButton」「LeaveButton」としています。
また、以下の画像のようにそれぞれのボタンについて「JoinButton_Click()」「LeaveButton_Click()」をクリック時のイベントに追加します。


最後にProject Settings→Player→Publishing Settings→Capabilitiesと進んでいき、以下の3つにチェックを入れます。
・InternetClientServer
・WebCam
・Microphone

以上で手順は完了です。
アプリの実行
HoloLens 2とTeamsで通信を行う手順は以下の通りです。
1. 【PC側】Teams会議に参加
2. 【HoloLens 2側】先ほど用意したJoinButtonをクリックする
→スクリプトで指定したTeams会議への参加を試みます
3. 【PC側】Teamsでゲストアクセスのリクエストが表示されるので許可する
以下は実際にアプリを動かしたときのTeams側の様子の静止画です。

動画ではないのでお伝え出来ませんが、Teamsから通信先のHoloLens 2のカメラ映像と音声を確認できています。
参考
クイックスタート: 通話アプリを Teams の会議に参加させる

